The layout of the main screen can be adjusted to suit the type of scheduling your performing. For example, you may want to create a new schedule for each day or you have the schedule span a couple of months. Both of these can be accomplished with MaxScheduler through this configuration screen.
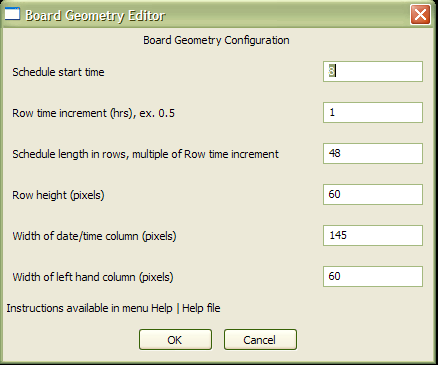
This screen is for configuration of board geometry. Here you can only edit the values. Each row represents some aspect of board geometry.
Schedule start time - specify the start time for each day of the schedule.
Row time increment - specify how much time each row represents. The unit is in hours. For example 2 means 2 hours. We recommend choosing a value that reflects the level of detail that you schedule for. For example if you want to run a schedule to cover 3 days then 1 hour increments is appropriate. If your schedule needs to cover 6 months perhaps have each row represent one day (24). Keep in mind that if you set Row time increment to 24 hours set the Work day hours to 1 for each day. If this is not done, you will experience usability errors.
Schedule length in rows, multiple or Row time increment - here you specify how much time the schedule will cover. It is a multiple of 'Row time increment'. MaxScheduler is a graphically intense program we recommend not exceeding 200 rows for a schedule.
Row height (pixels) - amount of display space given for each row in screen pixels.
Width of date/time column (pixels) - amount of display space given for left most column.
Width of right hand column (pixels) - amount of display space given for right most column.