MaxScheduler is most useful if you can import job data from another computer system such as an accounting system, MRP, ERP, WMS, etc. This way scheduling mostly becomes moving jobs from the List view onto the scheduling board. MaxScheduler can import ASCII based text files. Importing requires some configuration which is done through menu Configuration | Configure import manually. This screen defines the data fields for an entry in case your adding items manually.
The best way to start thinking about the import configuration is to start with a sample spreadsheet that you might want to import. Below is a sample:
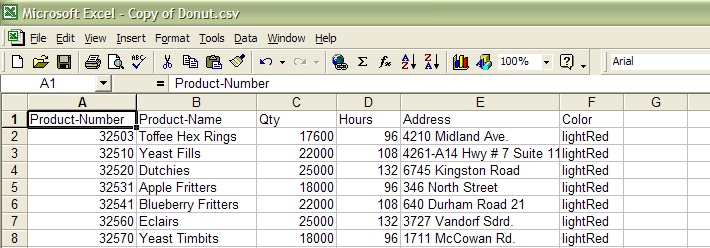
In this spreadsheet each line represents an item to schedule like a job or delivery. There are 6 columns of data for each row. In MaxScheduler we need to configure the import to bring in the 6 columns for data for each item. We consider these columns as 'attributes'. In the import configuration screen you setup the attributes (columns) that are expected to be imported. Here is the import configuration screen:
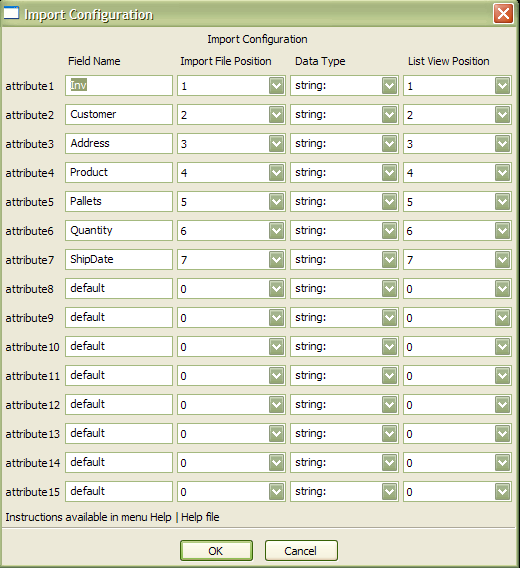
The first column is 'Field Name'. This is where you specify an attribute name. The second column is 'Import File Position. It is for specifying the position of the attribute in the import file. The next column is 'Data Type'. There are possible values of 'string', 'number' or 'date'. This is specifying what type of data the attribute is. If you unsure, just use 'string'. The last column is 'List View Position'. The List view is the blue area at the bottom of the main screen. You may want to move the more important data to the left of the screen since people read left to right. Through this column you can control this.
Once you've specified the attributes you want to import leave the rest of the entries with the value 'default',0,string:, 0. These are considered emptied and will be ignored.